How to create configurable products using CSV spreadsheet Import
I have gone through the process of creating configurable products manually for quite a few sites and its very time consuming. So, I decided to work out how to do it using a spreadsheet.
Here’s how to make uploading of products in your catalog easier and to avoid the tedious process of creating configurables manually.
In Magento 2, the easiest way to make mass changes to your catalog, is to upload them via CSV file using Magento’s ‘Import’ and ‘Export’ function. You can also quickly import new products, update, add, replace or delete existing products.
The CSV refers to comma-separated-value file format which is used for importing and exporting products in Magento 2. The CSV file has a specific layout scheme and the easiest way to get your hands on an example is to export a product list from your Magento.
Products need to be created in order to build a predefined CSV template:
If your store is empty, you need to create at least one product of each different type that you will be using e.g. (simple, configurable, bundled, downloadable or virtual etc.) I assume that you know how to create product types through Magento 2 admin. If not, then go learn before continuing with this lesson.
Why this step is important?
A CSV file has a specific structure where each ‘column heading’ corresponds to the actual name of the field that is represented by the column. By exporting the data from your store, Magento will build your CSV template for you. This entirely ensures that all product data in your CSV file completely matches the database and we will this as a road map for all adds/updates to products in your catalog you might want or need. NB: lower case is used by Magento and if you mix upper and lower case, your import will fail.
Export the Configurable Product:
On the Admin sidebar, go to Catalog > Products.
Find the configurable product to export:
- Click Filters.
- Set Type to Configurable Product and click Apply Filters.
- Choose the configurable product that you want to use for your test export and take note of the SKU.
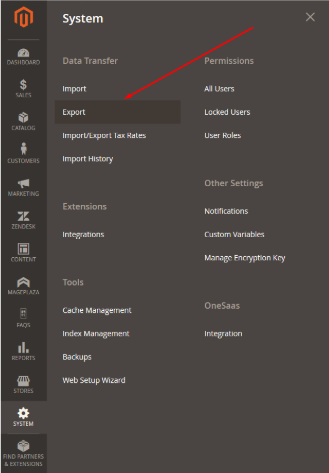
On the Admin sidebar, go to System > Data Transfer > Export.
On Export Settings, do the following:
- Set Entity Type to Products
- Set Export File Format to CSV.


Remember these rules when editing data in the CSV file:
- List children products before configurables.
- Prove the value in the ‘attribute_set_code’ column matches the name of the Attribute Set.
- Enumerate all the attribute set values for each child product in the ‘additional_attributes’ column.
- Fill in the set of SKU and Option in the ‘configurable_variations’ column.
- Check the correlation between the Attribute Code and the Label name in the ‘configurable_variation_labels’ column.
The CSV file will have a separate row for each simple product variation, and one row for the configurable product. The ‘product_type’ column shows multiple simple product variations that are associated with the configurable product.
Now look for the file in the download location of your web browser and open it as a spreadsheet.
Data Format:
Depending on the number of variations, the string of data in the configurable_variations column can be quite long. The data is used as an index to the associated product variations.
Each sku is separated by a pipe symbol (|), and attributes are separated by a comma. The value of each attribute is represented by the attribute code, rather than the attribute label. This is how the actual data appears:
Scroll to the far right of the worksheet to find the following columns:
- configurable_variations - Defines the one-to-many relationship between the configurable product and each variation.
- configurable_variation_labels - Defines the label that identifies each variation.

Additional notes for products with various options:
For configurable products, you’ll need to separate the list of the configurable SKUS and the attribute they vary by with the pipe | character.
When you understand the structure of configurable product data, you can edit the data or add new variations directly to the CSV file. The other rows can be deleted from the CSV file. However, make sure not to delete the header row with column labels.
Save the CSV file.
Import Updated Data:
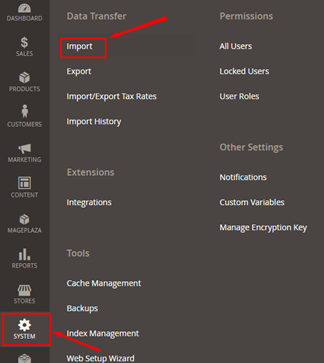
- On the Admin sidebar, go to System > Data Transfer > Import.

2. Under Import Settings, set Entity Type to Products.

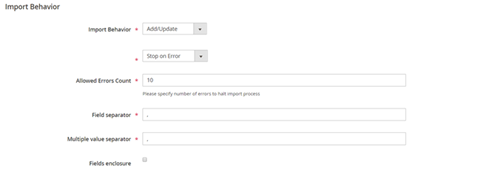
3. Under Import Behavior, set Import Behavior to Add/Update.

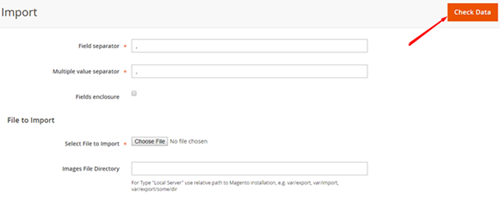
4. Under File to Import, click Choose File and navigate to the CSV file that you prepared for import and choose the file.

5. In the upper-right corner, click Check Data.

6. If the file is valid, click Import.

Otherwise, correct any problems found in the data and try again.
- When the import is complete, click Cache Management in the message at the top of the page and refresh all invalid caches.
The new product variations are now available in the catalog from the Admin and in the storefront. Go to the frontend to make sure everything works the way you needed/wanted it to work.
