Magento 2 – How to Create Configurable Products
Creating configurable products helps allows you to have products that give your customers options to them. Clothing stores could offer colour and sizes while tech stores have a tons of specifications that they need to account for. Configurable products allow you to do this quicker and easier.
A configurable product takes simple products and adds options to them allowing you to quickly set them up. This article will show you how to do this.
Creating a simple product is just a matter of following the steps.
- Choosing a Configurable Product
- Filling in the required fields
- Filling in the additional content
- Review your data
- Save and continue to create the configurations
- Configure the Shopping Cart Thumbnails (Optional)
1. Choosing a Configurable Product
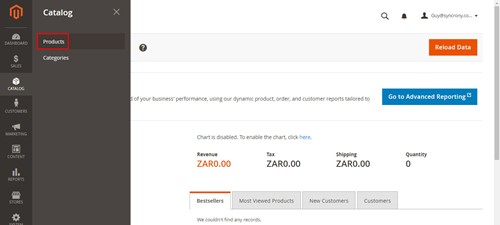
In the admin panels left navigation you will see Catalog. To add a product click Catalog and on the fly out click Products.
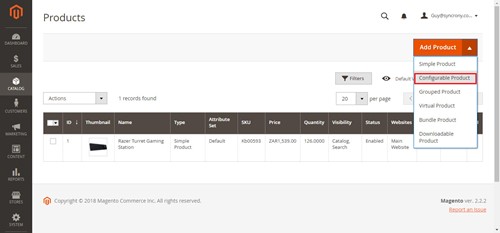
On the next screen click down arrow next to add product and select add Configurable product.
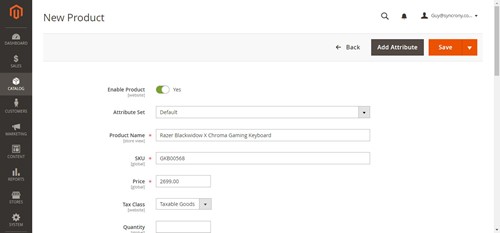
So we move on to the required fields. 1st if you have setup alternative attribute sets select the correct one. Then we fill in our required product fields.
2. Filling in the required fields
The following fields are required of all products.
- Product Name
- SKU (Store Keeping Unit) &
- Price
3. Filling in the additional content
So now we come to the additional content that gives the product meaning.
- Tax Class – is this item taxable or not?
- Quantity – even if your store does not track stock quantity to have a product appear on the sales side of your site it MUST have a positive quantity.
- Like with Quantity to have the product visible Stock Status must be in stock.
- Enter the Products Weight. Even if your shipping doesn’t use weight as part of its calculations I have found that not having a weight of any kind can cause some unexpected results.
- Categories – this is a dropdown checkbox list that you can use. You can select multiple categories even if they aren’t in the same tree. It also has a search function if you find you have too many categories to search through.

- Content – This is the information about your products. The wysiwyg editor should be enabled as default. If not click the show/hide button to enable it. Enter the content into description and short description boxes.
- Images and videos – you are able to drag and drop the images and videos on to the camera icon or you can click on the icon and navigate to the item to upload it,
4. Review Your Data
At this point check the Data you have entered. It will be carried through to all the configurations that you are making from this product. At the top of the page Disable the product and save.
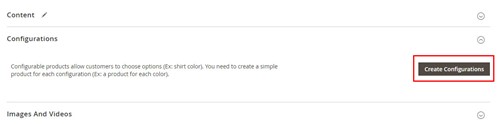
5. Create your Configurations
This section is going to be broken down into a few subsection so just follow along. Start buy checking between Content and Images & Videos, you will find Configurations. Click the Create Configurations button
- Select Attributes
- Select Attribute Values
- Images, Price & Quantity
- Summery
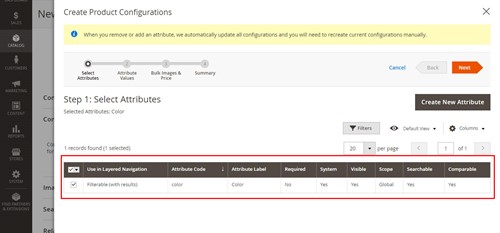
I. Select Attributes
Select the attributes (variations) your configurable products will be made from. Then click next.
II. Select Attribute Values
The attribute values are laid out as check boxes. Simply tick all the boxes that apply.

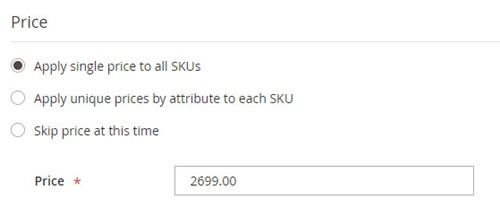
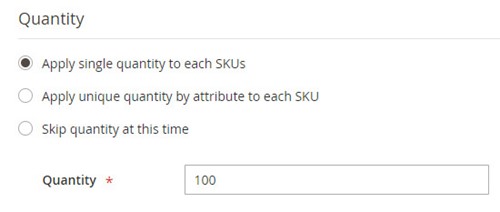
III. Images, Price & Quantity
In this step you are able to setup the configurations to be react in bulk or per SKU as shown below.
Images
- You Can choose to use a single image for all of the configurations

- Or you are able to give SKU its own individual image

- Or you could skip giving them images at this time.
Pricing
- As with images you are given 3 options:
- Apply single price to all SKUs
- Apply unique prices by attribute to each SKU
- Skip price at this time
Quantity
- As with the previous 2 you are given 3 options:
- Apply single price to all SKUs
- Apply unique prices by attribute to each SKU
- Skip price at this time
Remember to have a product visible it needs a positive quantity
IV. Summary
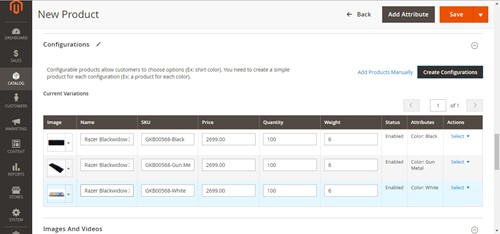
The 1st thing you’ll notice is that the configurations have had custom SKU’s created for them. This is always based on the attribute(s) you selected when you started to create the configurations. Review the products, make sure you’re happy and have used the correct images. Then click Generate Products.

Your Configurations have now been generated. Enable your products and save to publish.
Remember to refresh your system cache. The standard link should appear at the top of the screen.
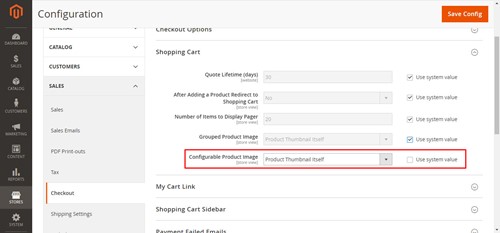
6. Configure the Shopping Cart Thumbnails (Optional)
To allow the configurations unique images to be seen in the shopping cart you will need to do the following.
- On the Admin sidebar, click on Stores -> Configuration.
- In the Sales tab, choose Checkout. Then, expand the Shopping Cart section.
- In the Configurable Product Image, select “Product Thumbnail Itself”.
- Click on Save Config to complete.
This has been the second article in my Magento product type article series. I hope it’s helped you with configurable products.